blood collectors and even patients. Discuss it below, put in some of your best and worst experiences with canulations, sub-cuts and blood taking – and I’ll definitely put any good tips I missed into the post. I’ve also got in touch with an old friend who’s working in a path lab, and she’s let me know of some further insights into how blood taking methodology can alter results, and, more importantly, how to reduce those alterations! Doctors take these results as gospel truth – but it’s important to note – alterations can happen and results can and do vary depending on how it’s collected.
THE TIPS:
are my best tips:
Preparing yourself:
Before cannulating, ask the patient (or check in their files) if any blood needs to be taken that day. It’ll save them another jab which is always appreciated!
Make sure you have the correct basic equipment. Often forgotten examples include:
I. –
An empty syringe – when taking blood it provides more suction than regular vacuum tubes so it can often draw blood where regular vacuum tubes can’t.
- The syringe should only be used though if the vacuum tubes can’t. From the lab’s perspective, too much suction causes haemolysis (destruction of red blood cells) which can alter results. If that syringe is needed, pull back slowly, allow the blood to pull itself back through the vacuum effect, to reduce the chances of spurious results.
- A saline syringe to flush canulas. It should be already attached to the bung/cap of cannula. This saves on the pain of having to manually pull and twist the cannula an extra time when you first flush it (often, that’s the bit that hurts the most). Nexiva canulas, which I’ll talk about below, eliminates this need.
- A tourniquet to raise venous pressure and hence allow blood to flow. Failing that a blood pressure cuff works fine too and is actually superior as you can set the pressure to be above venous pressure (20 – 30mmHG) yet below arterial pressure too (100 – ish mmHG) to ensure blood pooling without undue risk of hypoxia/ischemia to the hand.
- Gauze or cotton balls. A must – I’d keep a few ready and one placed below, or a bluey (or some other, disposable sheet) if possible where you’re about to inject. Blood inside cannula dressings can be an infection risk, and if you miss you should be ready to clamp down on it straight away. Bloody sheets/pillows are never fun.
- More than one strip of alcohol wipes, in case you need more cleaning or if you’re checking a few injection sites. It’s not fun being left, anxious and alone in a room, waiting to get stabbed while a nurse or doctor runs outside looking for extra wipes.
- Gloves and other requirements for sterility. In many areas, cannulation is becoming a fully sterile procedure, and many wards/units are clamping down on “cutting the tip off the end of a glove” for infection reasons, so being able to cannulate with goves will become more and more important. Try and do them with gloves on.
- Correct needles, of course. A butterfly is always best for the patient for blood taking purposes, on the patient end. They’re generally fine to use when you only require small samples.
- Although smaller needles are nicer for the patient – they can alter blood results (very fast flow through the needle can cause haemolysis too!) slightly, and slow down the drawing of blood, making it more likely veins can collapse. Too large though, and it’ll not only be more painful, but also more easy to miss. Getting the right balance is key!
- Remember you will need to choose the best one for the job – depending on how much blood needed, how big or small the veins look, or, in cannulas, at what rate medication/fluids will be pushed through.
- A small, yet short, plastic tube addition to the bung is also recommended. It will reduce pain for the patient from having to twist the cannula every time to flush it or when connecting new medications. Simply attach this to the end of the cannula and the nurses who administer medications through that cannula/port will no longer need to directly touch the injection site (reducing the need to move or twist it; thus reducing pain for the patient, as well as the infection risk).

Tape to hold down any such additions as in the above as well as to secure the IV tubes.
THE NEXIVA CANNULA.
What makes it the best cannula to use is its basic function. The needle in this cannula is inserted the same way as a regular cannula – with your forefinger placed on the soft tab in the middle (the wings supported by middle finger and thumb). As you withdraw the needle itself though, you need not pinch the vein down proximal to injection site as blood enters the tube meaning you will not come into contact with the blood or have any blood spurting everywhere.
After you insert you see initial flashback, followed by a second flash which is where you stop threading it. The amazing thing about this is the needle itself. When you remove it, simple pull back on the tab at the end and it pulls out with a cap on the tip – so needle sticks are COMPLETELY eliminated making it MUCH SAFER for the injector.

Make sure you gather all the correct equipment and keep it on a tray/trolley on your non-injecting hand’s side. This will ensure that you can reach all equipment easily without it getting in your way.
Try to be seated comfortably or, at worst, be kneeling, rather than bending over a patient. Unfortunately you may have to spend a while looking for a site to cannulate or injecting properly and hence a sitting down position with the patient high in the bed/seat (so you don’t have to bend over) is best.
Preparing the
Patient:
Try and get the patient to be properly hydrated before cannulating/taking blood. The more fluid and blood in you, the more likely it is to pool up in your veins, where you’re trying to go. Also, increasing turgor of the skin allows for easier injection.
Ask the patient if they’ve got any preferences based on previous experiences – especially if they have been cannulated often. I guess that some patients who have only had a few may not be experts on the matter, but at the same time I feel doctors in particular who cannulate me will often go for veins that I have insisted simply do not work (some god complex – “what would you know, you’re just a patient” mentality) and, more often than not, they’ll fail. I MEAN C’MON! I’ve had at least one hundred by now – and many patients are in the same boat, so if they have had a few before and it isn’t contraindicated – do listen to them.
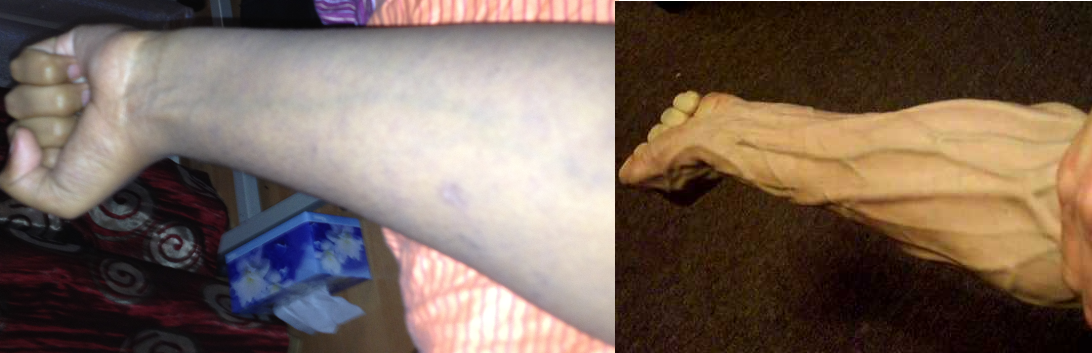
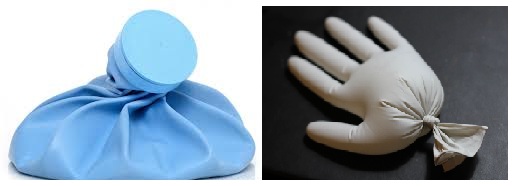
In order to make palpating the veins easy – place a heat pack over the arm/area which is most promising. It causes vasodilatation as blood attempts to cool itself by pooling to the surface in your veins and hence makes palpating and cannulating easier.
If a heat pack isn’t available, fill a glove with hot water and place it on desired spot or run a towel under hot water. I picked up this little trick once in the ward where they didn’t have a heat pack so there will always be a way to do this =]
Talking to the patient is VERY effective in reassuring patients and will reduce occurrences of syncope and also reduce vasoconstriction due to anxiety and the fight-or-flight response. Anxiety will also mean faster blood return to the heart, meaning less blood in veins to draw blood/cannulate easily. A two way dialogue will be best for this. Seeming confident will also reduce a patient’s anxiety, and hence make you more likely to get it right the first time. So even if you’re not that confident, act like you are – putting on a false bravado about your skills will not only help your patient, but also you as you won’t hesitate and miss by accident.
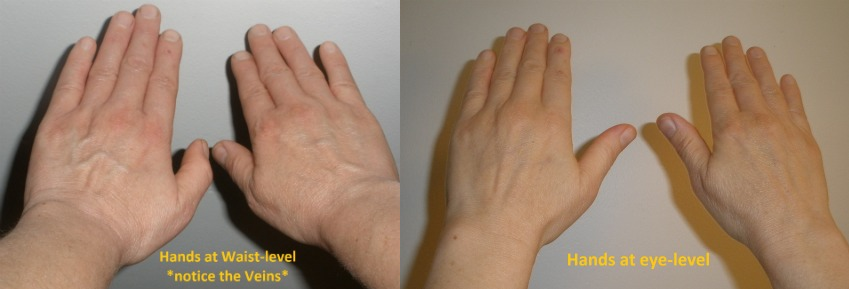
If veins seem hard to spot or palpate, place the arm you wish to cannulate below heart level with a tourniquet on it before resting it up in a position to inject. This will increase blood pooling to the veins due to gravity and the tourniquet will further the pooling effect.
Don’t forget to ask if they have any conditions which will make this hard/messy – eg) blood thinners, low platelets etc. and plan for it by having the appropriate gear with you.
Choosing/readying your site:
TAKE YOUR TIME AND DON’T BE AFRAID TO PASS IT ON TO SOMEONE MORE EXPERIENCED IF YOU’RE NOT CONFIDENT. Too often I’ve seen doctors/nurses rush in to cannulate and miss and end up spending twice as long looking for another vein (often only to miss again)!
When looking for veins, always try and rely on your sense of touch first. Seeing veins is always a good hint of where to go, but a vein should feel soft and spring back – even more so when the tourniquet is placed above it and other preparation measures are applied – and often sight can be deceptive as less suitable, superficial veins will seem more appealing.
For regular venipuncture, the cubital fossa is often a good place to look first. Care must be taken not to inject the brachial artery, but the veins are often large and always closer to the surface. However, for cannulation, the forearm, the dorsum of the hand and a vein on the radial border of the distal part of the forearm are more promising (although the wrist veins are usually small, painful and restrict movement). The cubital fossa is more susceptible to kinks and having the cannula tissue/extravasate, as patients move around at the elbow a lot, . People underestimate the pointiness of the actual plastic cannula and don’t realise that it can penetrate the vein from inside if it moves around too much! Unfortunately, in emergency wards, they often attack this vein unnecessarily for cannulation because it’s easier to get. In my eyes – it shouldn’t happen if a patient is being sent up to a ward or observed – only reserved for “get the cannula in or die” situations.
There are deceptive muscles and tendons in your hands that will feel like veins. So get the patient to flex a few times if you’re trying to differentiate between a vein and muscle.
Forked veins seem to roll less but remember – they often have valves by the bifurctication. So instead of going in at the bifurctication, go slightly proximal to it (in order to avoid valve yet still get a vein that is less likely to roll)
Place the tourniquet about 20cm proximal to a promising site. Too far will not ensure enough pooling and too close may just constrict your entry point. It is generally considered safe to have a tourniquet on for five minutes maximum before ischemia becomes an issue – though I wouldn’t risk getting too close to that time, and wouldn’t tighten it too much.
Look for already straight veins. Pulling the vein straight won’t do anything when choosing a sight or when injecting, as it will revert to its original position.
Valves can be tricky. However, they are palpate-able as small dips as you pass along a vein. Avoid these at all costs as they are very hard to navigate out of and cannulate/venipuncture.
Tap the vein gently in order to vasodilate the veins. Doing so will cause slight stress in the vein to release NO which is a vasodilator as well as histamine from mast cells which have the same effect. Rubbing gently has a similar effect and is actually more effective on cubital fossa veins.
When sterilising the skin with alco-wipes, allow at least 30 seconds for it to air dry. Not only will it allow more bacteria to be properly dealt with, it’ll mean the stuff won’t sting if it gets pushed into the vein. Fanning or blowing it will only increase chances of infection and cause the alcohol pool up in areas, potentially increasing the stinging as you inject.
Place the patient’s hand on a pillow or a stable yet soft object in a comfortable position as you are about to inject both for comfort and ease of access for you. Don’t forget to have a bluey or piece of gauze underneath where you’re entering for cannulas!
Going In – keeping the patient calm and getting it right:
To stop vein from rolling away, pull the skin and muscles a few centimetres from the vein taut. Do not attempt to straighten the vein
overtly, as, as I’ve mentioned before, it will retract to its usual state as you inject anyway, causing tissuing and more pain.
Distraction therapy is helpful. Not only can you talk to a patient as it is about to go, I’d suggest getting them to look away. The natural fight-or-flight response will quicken heart rate, even subconsciously, and cause less blood to pool in the veins you’re aiming for. Other methods include getting them to focus on doing other things like wiggling their toes or tapping on a table (not your rest table of course) to get their mind off it.
With kids in particular, this is vitally important. You cannot lie to them about the pain, as it may lead to involuntary jerks or movement as you inject, but getting their mind off it will definitely help. Again, the trusty glove can be blown up and have a smiley face drawn on it to make it look like a spiky-haired friend. Definitely will cheer up the kids =]

As you inject, the best angle, in my experience (and that of the best jabbers I’ve talked to) is anywhere between 10 and 30 degrees. Also, a quick jab as you pass through the skin is most effective in reducing pain – although taking it slow after you hit the vein wall is essential. You don’t want to jab through the other side.
Don’t forget to point the bevel up towards you!
Local lidocaine, a weak anaesthetic, is also an effective way to stop pain. But only if you can master injecting it into the dermis (level of skin just under the surface) rather than into the vein. A small jab into the dermis only 1 or 2mm into the skin followed by a slight push of only one or two drops should be enough to make the cannulation almost painless. This is usually more useful in larger gauge cannulas or on difficult-to-cannulate patients, and, like any local, you should give it time to take effect before penetrating the skin again for the cannulation.
Don’t feel you have to inject from right above the vein! Pressure directly on top of the vein can often cause elastic veins to roll more, so going at an angle and entering the vein under the skin rather than going straight above it can help.
Once you are inside, and you see a flash of blood, go a few millimetres deeper in order to ensure that the cannula is genuinely inside the lumen of the vein
and not just the needle tip. Has happened to me a few times where they removed the needle too soon and just ended up being a bloodier-than-usual miss.

false impression of being inside the lumen when only the needle point/bevel end is. Going
only a little deeper will ensure the cannula is properly inside. Using a nexiva cannula while withdrawing (requires a bit of practice) the needle removes this necessity.
9. If you do not see the flash of blood, do not immediately remove the needle. Attempt, with consideration for the patient (as it can be painful) to withdraw the needle a few millimetres
in case you went to deep. The needle may be resting on the opposite vein wall, so doing this will ensure quicker blood flow into the needle during venipuncture in particular.
Palpate around the needle to see where the vein is and where you should go if you need to adjust it further. Though painful, in my experience, and from what nurses and doctors have told me, “digging around” for the vein after you’ve missed is less torturous than having the needle reinserted elsewhere.
press down to prevent bruising from blood seeping into tissue.
POST CANNULATION
Try and put a small tube that extends beyond the cap of the cannula and tape it down along the length of the forearm/arm. This ensures that the patient will not have to have the cannula twisted every time it is accessed and hence reduces chance of kinking and extravascation inside the vein too.

Anchoring the cannula. The most powerful anchor on a cannula I’ve seen and had done on me was to place a strip of tape underneath the cannula, perpendicular to the direction of the cannula with the stick side facing up. Criss-cross the tape around the insertion site, making a “bow” shape (see picture below). Place your usual, preferably transparent dressing over the cannula as you usually do and finish by placing a strip of tape again perpendicular to the cannula direction, but this time toward the cap to anchor it firmly. Although you may not see the injection site, most problems arise from the cannula slipping out rather than an infection near the entry site (which can be seen through this anchor anyway) so a good anchor like this IS necessary.

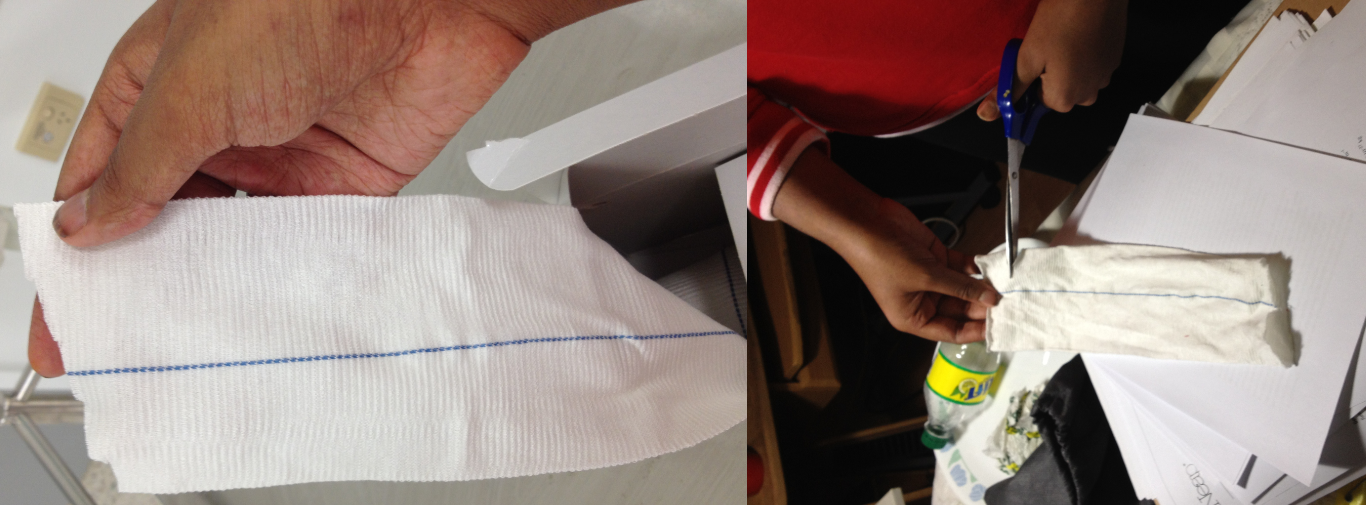
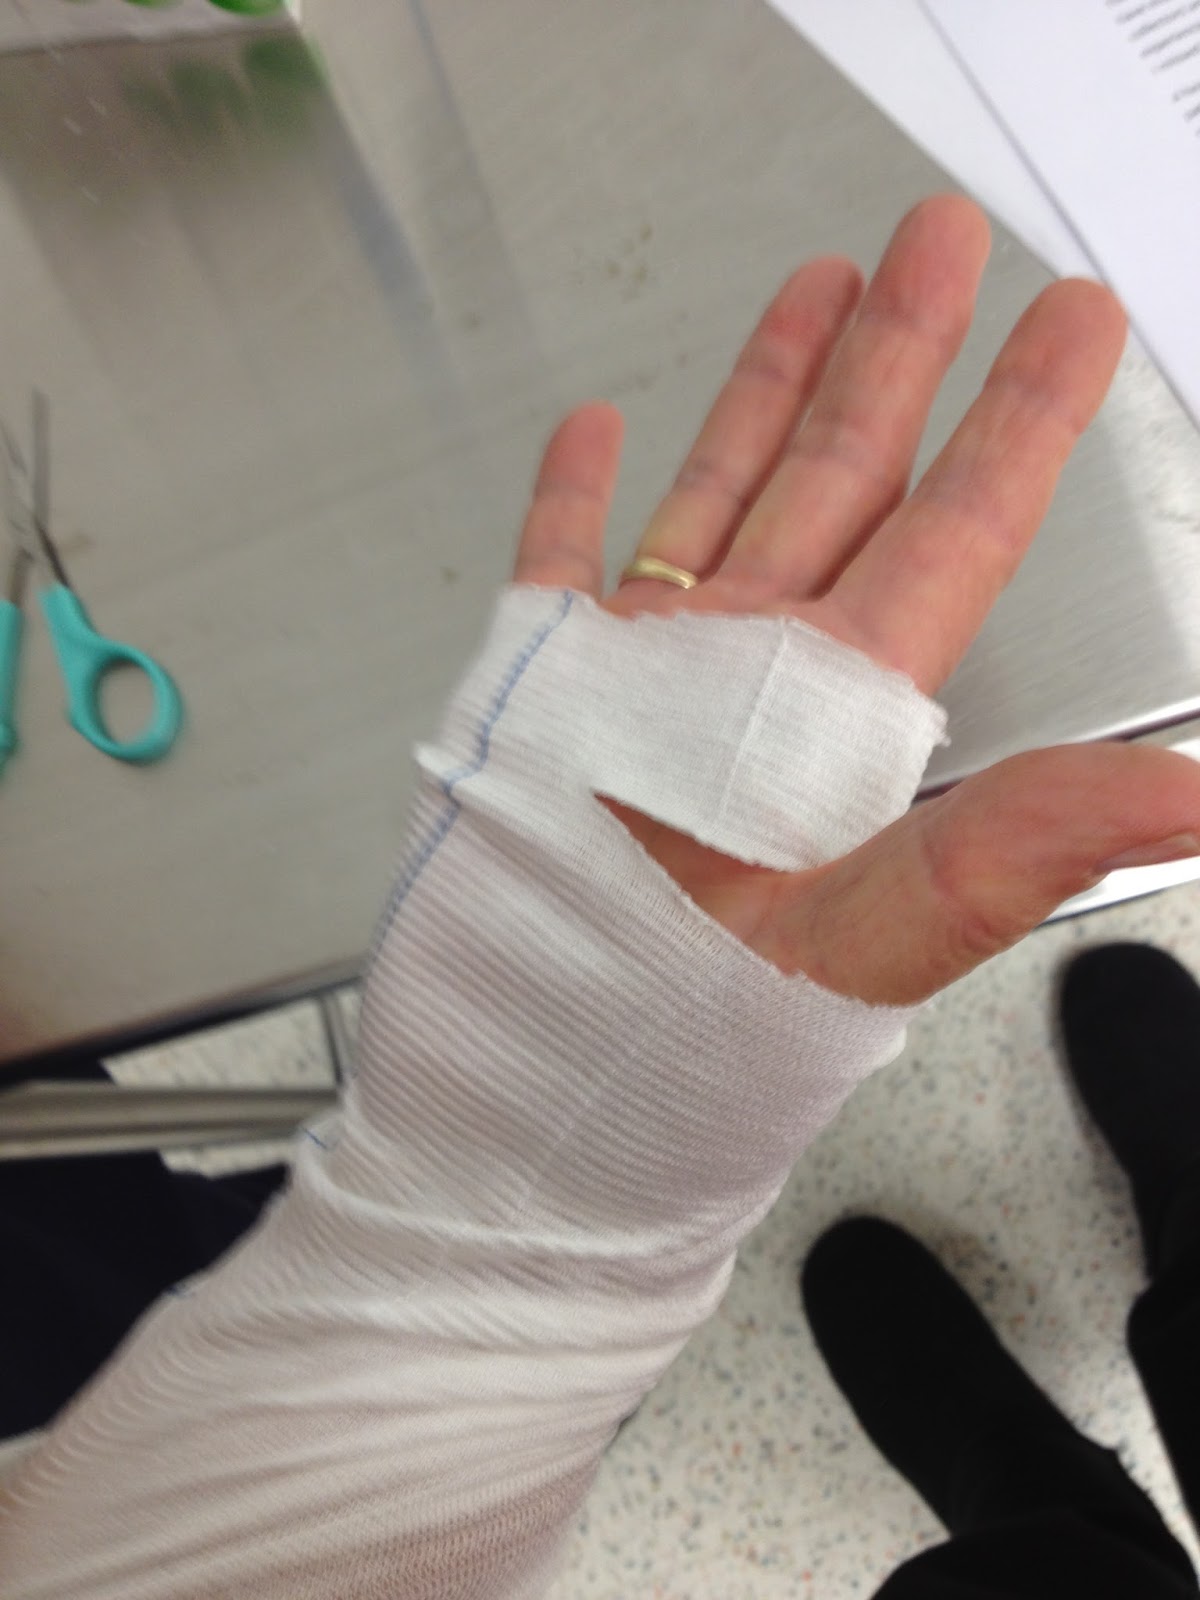
Give the patient a “sock” to place over the cannula. Can be easily created from a cotton ribbed stockinette (easily findable in any medical store-room) by cutting a decent length of it out, enough to cover cannula and portion of forearm, and making a small slit on the side where you can feed the patients thumb through. This will protect the cannulation site and stop
unnecessary kinking and pain on the patient’s end too. Having just had a cannula tissue due to the dressing pulling back today, I realise doubly how important this is now!
Removing the needle:
Again, keep a piece of gauze ready as you remove the cannula/butterfly/syringe.
Immediately after removing it, press down hard on the insertion site. This will reduce bruising significantly post removal as the major cause for bruising in this procedure is allowing blood to seep into the tissue and hence bruise the area. Ask the patient to hold it down for two minutes after removal of cannula.
A very good tip is to tie a tourniquet around the insertion site very tightly (around a piece of gauze/the dressing of course). This causes any bleeding to stop rapidly and will significantly reduce bruising and bleeding.
https://www.facebook.com/musingsofamedstudentpatient <– If you or a loved one needs help or if you enjoy my blogs or if you’re interested in medicine, like my page on facebook =]
Nexiva cannula – more info/reference and details on if they’re in your hospital:
http://www.sarb.be/fr/journal/artikels_acta_2005/artikels_acta_56_3/acta_56_3_vanzundert.pdf
Leave a Reply